DIY Fabric Postcards for Valentine’s Day
My favourite childhood memories from Valentine's Day are decorating the “mailbox” you left out to receive cards from your classmates. Arts and crafts AND mail!?! Simply the best. In the spirit of reviving similar ~vibes~ this year, I decided to DIY my own Valentine's Day fabric postcards and mail them out to some of my friends and family. Though I have not tried paper piecing myself (yet), it made me realize that you can (and it’s okay!) to sew through paper. A video from the National Sewing Circle — Making Greeting Cards with Fabric and Paper — confirms that you can do this with cardstock if you use separate needles exclusively for paper. I love a crafty project and thankfully had all of the materials as well as the envelopes and stamps to make these cards without leaving my house or purchasing anything.
Steps and Materials
The video linked above uses colourful cardstock and complimentary scraps of fabric to create decorative cards that appear almost as applique. I didn’t have cardstock but used some thin cardboard that would have otherwise been recycled. In comparison to cardstock, cardboard is harder to fold, so I decided to make a postcard instead of a card that opens. The postcard will be assembled as follows:
Layer 1: a fabric front, made from fabric scraps
Layer 2: thin cardboard (in lieu of cardstock), I used old cereal and tissue boxes
Layer 3: construction paper and pen for writing my message
In addition to the materials needed for the postcard thin cardboard I used:
A sewing machine and decorative stitches
Red polyester thread to sew the three layers of my postcard together
A needle dedicated for sewing paper only
Regular scissors for cutting cardboard down to size
Fabric scissors for cutting fabric scraps and trimming threads and fabric edges
Clips to hold the layers together (or pins). Alternatively, use your thread to make a few basting stitches.

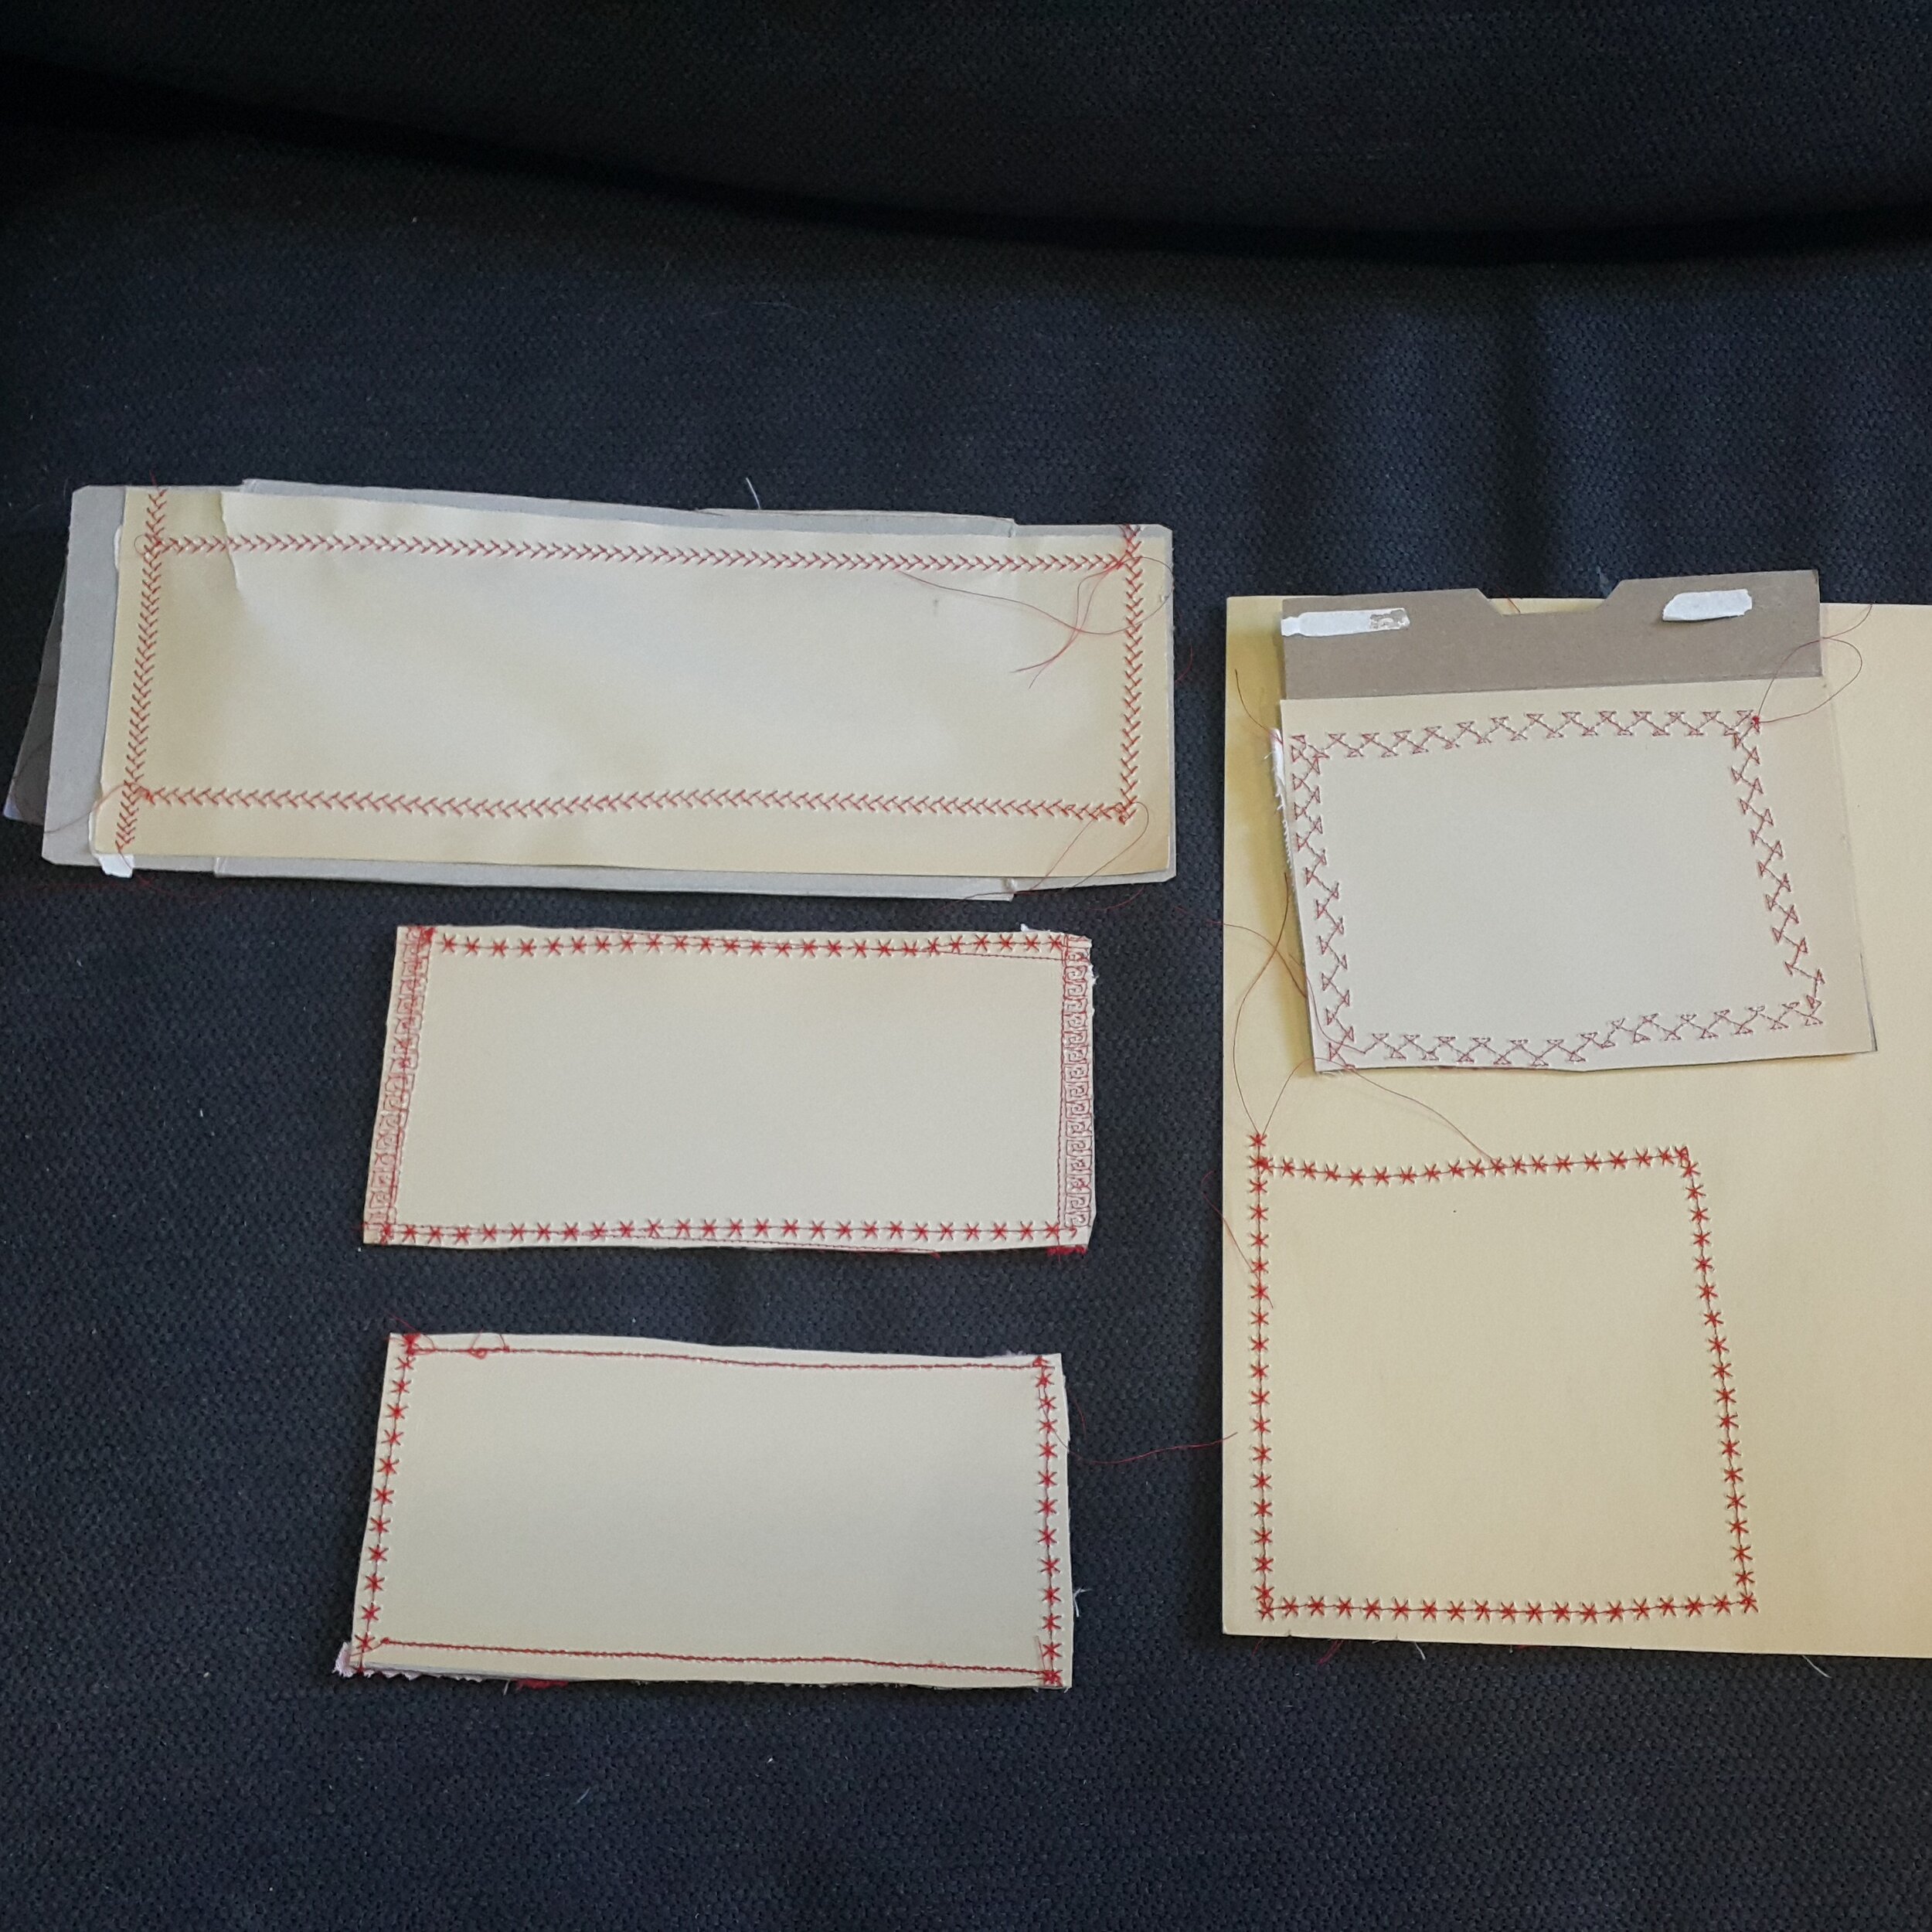
An overhead view of the materials used to create the three postcard layers. On the left hand side of the picture is the thin cardboard that makes up layer 2. Pictured is a broken down cereal box and two tissue boxes. In the top right corner are five fabric blocks made from scrap patches. Four of them are a random mix of solid white, solid red, and pink paisley scraps. One patch is a greyscale of solid black, solid white, solid light grey, and a darker grey with an arrow print. The bottom right hand corner contains a beige piece of construction paper, which where the greeting will be written. A pair of regular scissors sits on top of the paper.
Step 1. Prepare Fabric and Paper Layers
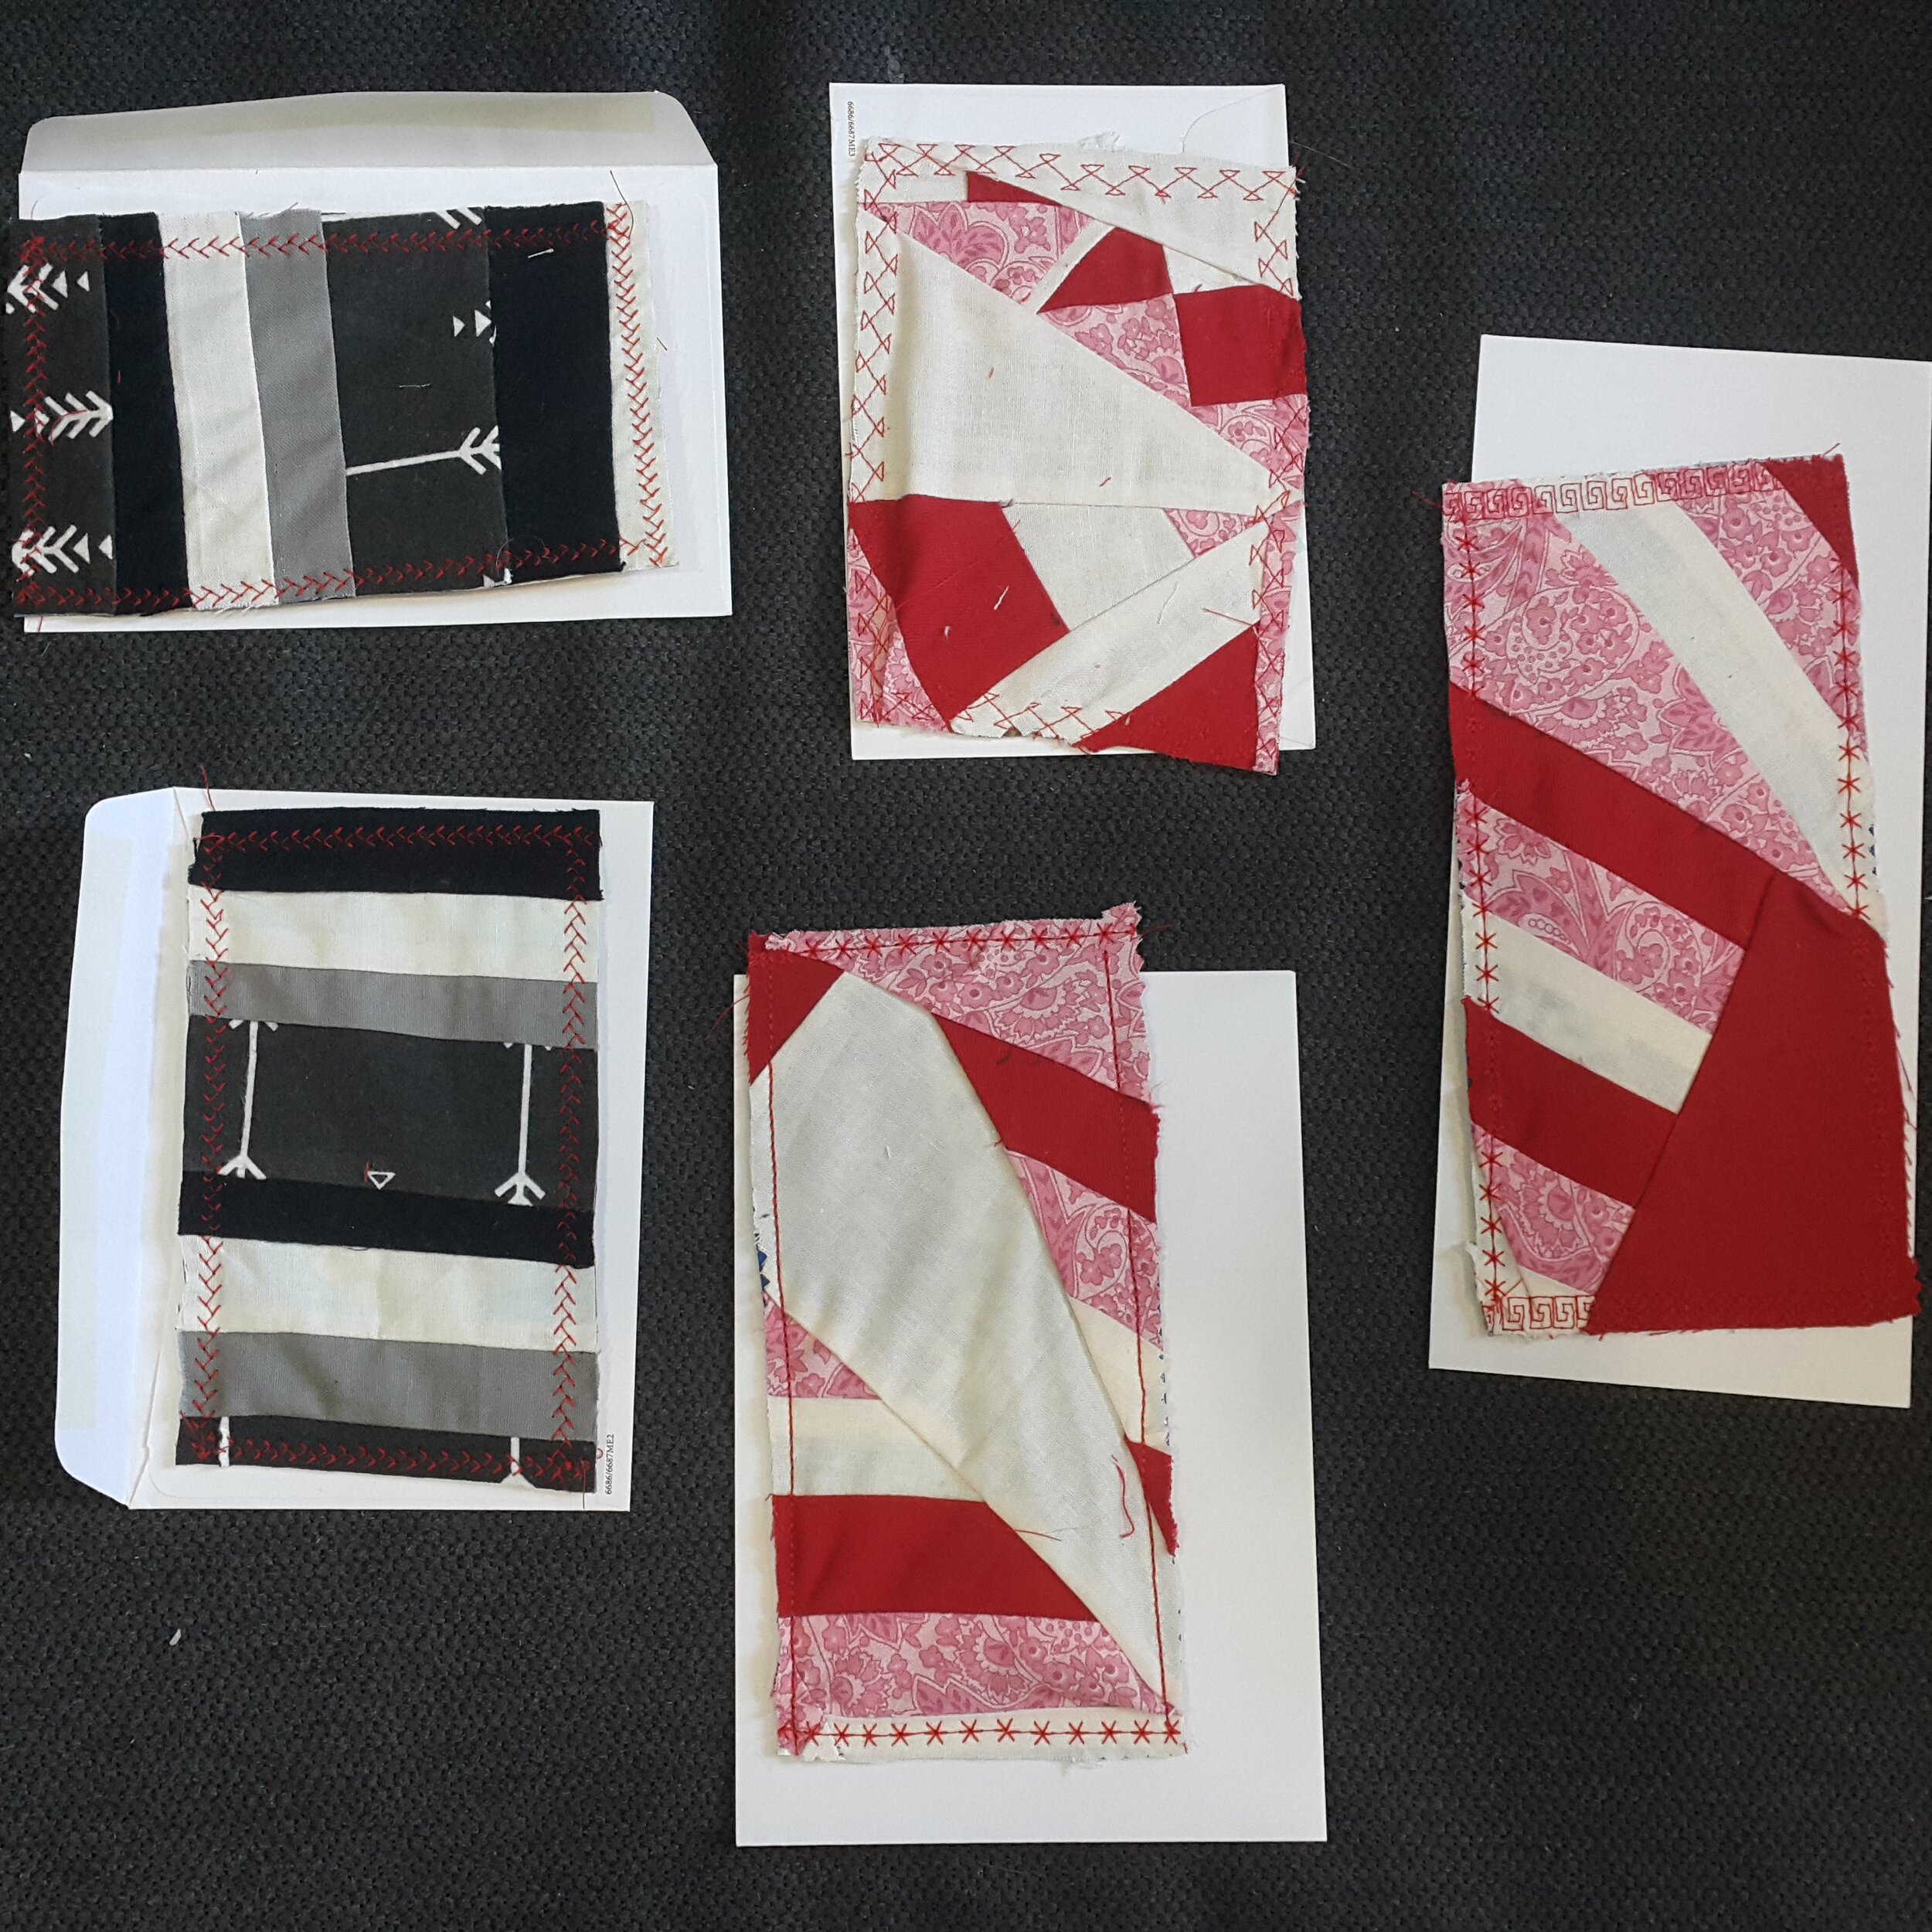
I went to my fabric stash and pulled small pieces of fabric in classic Valentine’s Day colours of white, pink, and red and piece those together in a random way. I also decided to go with a less traditional greyscale colour palette and opted for stripes so as not to disrupt the stripes from the arrows too much.
The cardboard I was using had ink printed on one side and needed to be covered entirely, so I did some improv quilting to create bigger patches. I decided to cover the printed side of the cardboard with fabric, thinking that the fabric would cover the ink completely. For the most part, I was correct, though you can see some of the ink through the white fabric I used.
Step 2. Pin/Clip/Tape Fabric in Place
I used clips to hold my fabric layer, cardboard layer, and construction paper together. I wish I re-watched the video before I started this process because there was a small tip to use tape to help keep fabric pieces in place. I suspect that the glossy nature of the cardboard side made it especially easy for the fabric to slip out of place, so my postcards include some wonky seem lines. I did use plastic clips (I love my plastic clips!) to hold all three layers together, which was fiiine but next time I will sew some quick basting stitches instead. This will allow me to hold the layers together in multiple places without using bulky clips which can make it tough to run something through a machine.
Step 3: Sew Fabric to Paper
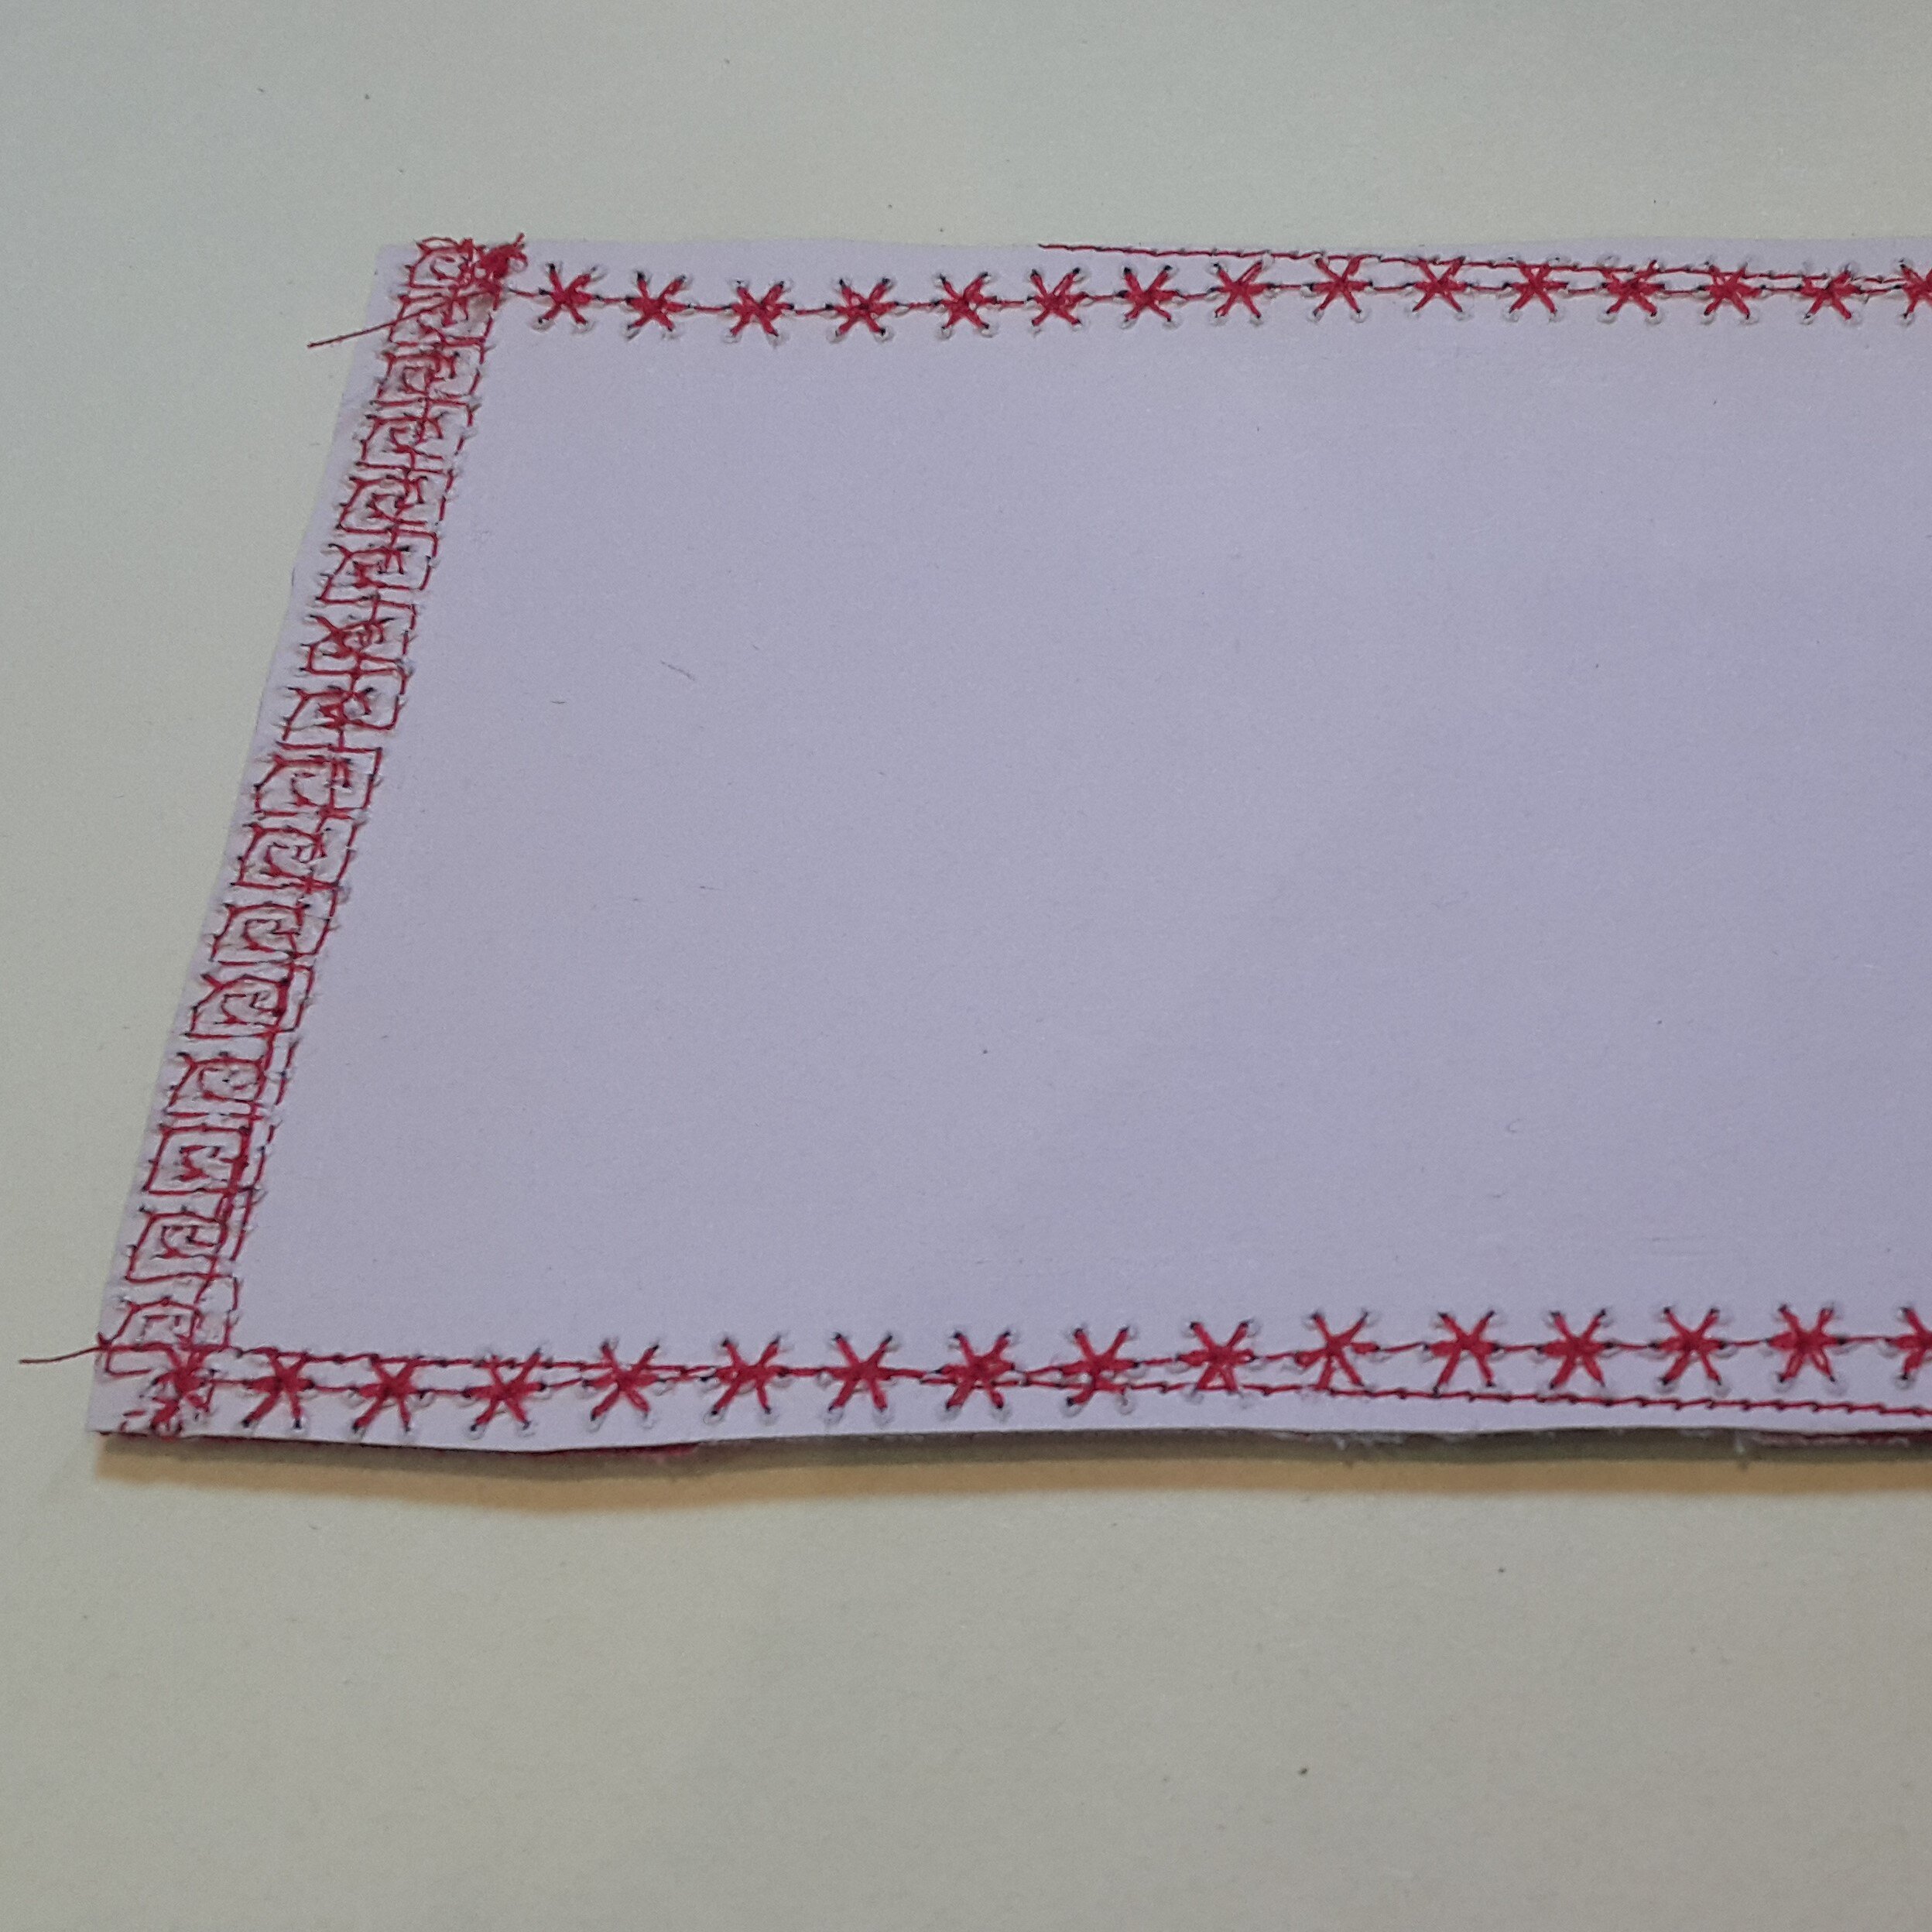
When I was sewing the first postcard, I sewed the layers together in two steps. I began by securing the construction paper to the blank side of the cardboard with a basic straight stitch and then used my decorative stitches to sew the fabric to the other side. The plan was to keep my decorative stitches within the border I created with my first line of stitches. Unfortunately, due to the slipperiness, you can really see the decorative stitch deviate from the edge.Once I finished sewing the first postcard, I decided that for the remaining postcards, I would sew all three layers at once just so that there were fewer visible seam lines.
Step 4: Mail Your Cards
For me, the hardest part about mailing things is remembering to plan ahead. Adding a calendar reminder is a helpful way to make sure you leave yourself enough time. If you happen to know what time of day the mail is picked up by the postal worker, you can be reassured of the day it’s en route. In addition to making the actual cards and taking some time to write your message, you’ll need to gather stamps, envelopes, and the full mailing addresses of your recipients. I'm always impressed with how quick the postal service is within the city and province but I’ll also double check to see if there are any delays because of weather or volume.
What I’ll Do Differently Next Time
The next time I DIY my own fabric cards, I will definitely use a few small stitches to keep my layers together, especially if I decide to write my message on a separate paper. If I have the time and am organized enough, I will also use my computer to help me print my message, either on the separate piece of construction paper or cardstock.
Homemade postcards are a great way to use fabric scraps and practice my improv quilting techniques. It’s also a nice way to reuse cardboard instead of recycling it. In fact, I think that these small projects are a great way to try new techniques and applique or embroidery might be a fun experiment, which is something I wanted to try since redoing my t-shirt quilt.
A Couple of Quick Measuring Tips
Tip 1: If you are going to place your postcards in envelopes, as I chose to do, make sure your paper layers fit into your envelopes before you start sewing. Mine did not and I had to cut my postcards down to size. Thankfully this didn’t compromise the design but it was an extra step that you can avoid if you do a little measuring beforehand.
Tip 2: Because I had some issues with my layers slipping, I had to use my scissors to trim any overhang and ensure all three layers were even. At first, I cut my construction paper to match my fabric layer, but eventually opted to cut this layer but bigger than necessary so that I could cut down everything to the size of my fabric.
I am so fortunate to have people in my life who send cards for holidays, life updates, and sometimes for no reason at all. I’m always a little happier after I open something so personal, but it has been extra special to receive mail from my family and friends after spending so much time away from them for the past (almost) 365 days. I used to think about sending cards with this aspirational “I wish I was that kind of person” attitude and this year I’ve tried harder to stay connected to people this way.
One reason that I like cards so much is because they are a gentle act of care. I am not sure what the social etiquette around cards used to be, and I’m not sure if I continue to be unaware, but from what I understand a mailed card does not need an equal reply. It’s always nice to acknowledge the gesture, just so the sender knows their delivery was successful, but the slowness of mail doesn’t require immediate action. And that’s what I’m getting at when I say sending a card is a gentle act. It’s a way to check-in and show someone you care without the expectation of any immediate reply or even the pressure of leaving someone on read. A card is a soft and quiet way of saying “hey, I’m here thinking about you just so you know”.