Sewing Knit Fabric: Basics and Best Practices
When I started sewing my own clothes, I bought two patterns. Once they arrived, I opened the envelopes, marveled at the neatly folded paper, and spread them out on my floor knowing they would never look as neat again. I scanned them for the information I expected to see: lines that indicate grain direction, graded sizes, where to cut on the fold. I took notice of the dots and markings I expected to see but hadn’t ever worked with in practice. I also saw information I hadn’t really thought about - like how to take measurements, lay the pattern out on fabric, and detailed assembly instructions. I was intimidated by these patterns and felt nervous to start so instead I downloaded a simple free pattern and bought some remnant fabric just to get comfortable. In addition to this sewing practice, I did a bit of research, and even made myself some curved rulers.
You can read more about the garment I sewed in my “Projects section” but in this post, I’ll share what I learned from my internet research and some observations from putting this research into practice. This includes: how knit fabrics are constructed, types of knit fabric, identifying the selvedge (or selvage) edge, warp threads, and weft threads, the basic tools you’ll need to sew knit fabrics, as well as some best practices.
Knit fabric is beginner friendly
My introduction to sewing was quilt making with 100% woven cotton. I assumed that I needed more equipment and knowledge than I had in order to sew with knits (like access to a serger) but fortunately, lots of blog posts and videos from home sewists bust this myth and offer encouraging advice. So far my experience sewing with knits has produced wearable pieces that despite their flaws and imperfections are still cute, comfy, and come together within a day.
There are so many wardrobe staples made from knit fabrics -- t-shirts, sweatpants, leggings, dresses, sweatshirts, underwear, athletic wear -- so the project options and applications are endless and don’t often require advanced technical skills. What’s also great about these types of garments is that they need not be perfect in order to wear at home, to the gym, or even in the most casual of public settings.
Knit Fabric Construction
Part of my preparation was understanding basic information about how knit fabric is made so that I could lay out my sewing pattern correctly. Check out my longer post for some basic fabric info, but here are some quick points:
Fabric is composed of fibres. Fibres are derived from natural or man-mane sources.
Fibres are assembled together to create fabric.
The type of fibre + the way they are assembled will determine the fabric’s properties.
Understanding properties is key to selecting the right fabric for your project.
In knit fabric, the fibres are looped together (rather than woven)

A schematic diagram of a basic knit fabric showing how fibres are constructed into interconnected loops. Source: Wikimedia Commons.
With regards to my pattern, it mentioned the terms “warp”, “weft”, “selvedge edges” and “grainline”. I vaguely understood that grainline implied implied direction of the fibres. I had heard of the warp, weft, and selvedge before but only as it applied to woven fabrics. Visualizing a weaving motion in my head (whether it’s a loom, a basket, or the top of a pie) is helpful, but I often return to Wikipedia for a refresher on a few terms.
With regards to construction:
Textiles are constructed by weaving a thread (called the weft) over and under a series of warp threads
Warp threads run perpendicular to the weft thread and are secured tight at each end
One pass of the weft over the warp threads creates a row
At the end of the row, the weft thread turns back and makes another row beside
When looking at a big piece of fabric, you can see that many rows of fibres laid together create length. If you can see these rows, you can identify the selvedge edge.
The selvedge edge is created when the weft thread turns back at the end of the row
The selvedge edge runs parallel to the warp thread (and opposite to the weft)
The selvedge and the grain line run parallel (same direction)
Applying these terms to knit fabric, which doesn’t have an obvious salvage edge, I instead looked for these “loops” at the end of the rows. As far as I know I *think* this is correct. As I become more familiar with fabrics, I will try to learn how to identify the selvedge edge based on stretch or other visual indicators.
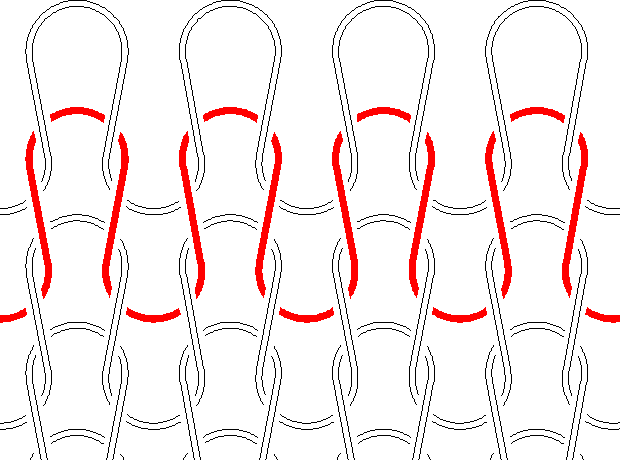
Diagram showing six warp threads running vertically, while a single weft thread is woven between them. The weft thread loops around once it reaches the last warp thread. These looped edges create the selvedge edge. This photo in from the Archives of Pearson Scott Foresman and was donated to the Wikimedia Foundation.
Stretch
Speaking of stretch, there is a built-in stretch to the loops of knit fabric. You can demonstrate the loops of knit fabric with your thumbs and two of your fingers. Create a link with the thumb and first fingers of each hand. Even if both your thumbs and fingers stay closed and linked, there is still space and the ability to move for these links to move around. You can even stretch your fingers links out, from circles into oval shapes. In knit fabric, these interconnected loops have a built in slackness and flexibility that allows them to be pulled. The stretchy nature created by just the way the fibres are constructed is called mechanical stretch.
There are other ways to add mechanical stretch to knit fabric. One way is to construct the textile with interlock twist yarn. As the fabric is knitted together, the fibre is twisted, which I imagine adds more “slack” to the thread so that it can be pulled. Ribbed knit fabrics (more on that below) are by nature more stretchy.
Stretch can also be added to fabrics by incorporating spandex (brand name is Lycra) fabrics. Spandex contributes to a garment's recovery, or its ability to stretch without being distorted or misshapen after being worn or washed. Spandex is frequently used in athletic wear, bathing suits, and underwear.
Analogies to Knitting
In Love to Sew’s Sewing with Knits episode, Helen makes several analogies to knitting when describing different types of knit fabric. As someone who has tried to crochet and has seen intricate knitting from my aunt, I could vaguely picture these references and found them very helpful for visualizing different stitches as well as for identifying the right and wrong side of a fabric. Jo from Jo Creates has taken fantastic photos of different knitting stitches as well as small swatches.
A knit stitch is the foundational way to assemble fibre into loops. Knitters refer to this as garter stitch [FYI: even though this is read as “garter stitch” it refers to many rows and columns of knit stitches as is more analogous to a piece of fabric]. Garter stitches are the same on the front and the back and do not curl, and are often used to finish pieces.
A stockinette stitch consists of a row of knit stitches and then a row of purl stitches. Alternating these single rows creates fabric that is flat because all of the knits are on one side and all of the purls are on the other. The edges of stockinette curl.
Ribbed stitches have alternating knit and purl stitches on the same row. This construction creates considerable amounts of mechanical stretch, which is why you see ribbed cuffs on sweatshirts and sweatpants, areas that tend to be pulled on with wear. I wonder if this has to do with the difference in tension between knit and purl stitches, but instead of being in the bottom rows, this difference in tension is spread out more evenly between the columns of stitches. I’m not sure.
Types of Knit Fabrics
Remember that fabric is composed of fibres which are sourced from a variety of sources. The fabric can be of one fibre type or a blend of fibres. So the types of fabric listed below can be further described by the fibre (cotton jersey, bamboo jersey, merino jersey). The properties of the fabric (weight, hand, stretch) will also vary depending on how the fabric is knitted together.
Jersey is the basic knit fabric and is also known as single knit or just knit. The cut edge curls to one side because it is essentially a stockinette stitch where all of the knit stitches are on one side, all of the pearls on the other.
Fleece is a napped fabric where the fibres are brushed to appear fluffy.
French Terry or French fleece has looped fibres (rather than brushed), which creates a soft pile but it’s not as warm as fleece.
Spandex knits have high recovery due to the spandex fibres. These fabrics are great for bathing suits, athletic wear and dance wear.
Ponte de Roma is also known as a double knit or interlock knit. It’s thicker, doesn’t as much as other knits, but it’s edges won't curl when cut. It’s sturdiness means it can be used in place of a woven. There isn’t typically a wrong or right side.
Ribbed knits have precisely arranged knit and purl stitches which creates a series of alternating vertical lines. This construction creates even more mechanic stretch than the basic jersey/Stockinette stitch
Sweater knits come in a variety of different weights and loop sizes and are assembled to look like a chunky knit sweater but are constructed similar to single knits.
There are also novelty knits - lace, velvet - which are perfect for fun projects.
I picked up a bunch of single knit fabric without thinking too much about the fibre content, weight, or feel. I purcahsed two cotton/lycra blends (the cat print and stripey pig fabric, below) as well as some polyester/spandex blends (the brushed blue knit and textured black knit below. FYI that Lycra is just a brand name for spandex.
Single knits have a back and a front side
A lightbulb went off in my head when I read “How to Knit and Purl”. This post described the purl stitch as a backwards knit stitch required in order to create the same looped structure in the previous row. The “right” side of the knit fabric will look like a series of interlocking “V”s while the other side of the fabric will look like curly waves.


Getting Read to Sew Knits: A Checklist
If you are willing to invest in basic sewing equipment, or if you already have access to the tools, you can practice sewing knits without any major expenses.
Equipment and tools
A machine capable of a zig zag stitch will spread more thread across a given length of fabric than a straight stitch. This extra length allows the thread to stretch, rather than snap, alongside with the knit fabric. High quality polyester thread will help with the thread’s durability.
So as not to damage the fabric, use ballpoint or universal needles in your machine. The tips of these needles push the fibres aside instead of tearing through them.
Every home sewist should have the basics: fabric scissors (or a rotary cutter), a straight edge, as well as an iron with steam. For knits in particular, steam can help lay things flat.
The following tools are nice to have but are not necessary
Overlockers and overcast machines can finish seams nicely, but the same can be accomplished on a regular machine with a zig zag stitch or twin needles
A twin needle is a nice way to finish hems, but a zig zag can be used
A walking foot can help feed the fabric through the machine without it being pulled by the feed dogs
Clear elastic or flexible seam tape for reinforcing the shoulders (a free alternative is selvedeg or non-flexible fusing if you have it).
Eloflex thread is a twisted thread specially designed for knit fabric
Curved rulers are helpful, but scotch tape dispensers and bowls can offer useful curves as well. (For an inexpensive solution, I made my own curved rulers out of cardstock and thin cardboard that are pretty effective.)
Best Practices
Some of the best practices and tips shared here were gathered during my pre-research and some are my own observations. For more troubleshooting tips while sewing to the best beginner patterns, I highly recommend checking out Episode X of the Love to Sew Podcast. For now, here are 7 recommendations:
Pre-wash your fabric. Always a always a good idea to ensure a proper fit, though knit fabric tends not to shrink as much as woven
Read your pattern instructions. I ended up ripping a side seam instead of attaching the sleeve and finishing the arm of the sleeve and side seam of the shirt. While I’m sure I could have closed the sleeve separately, the other way seemed cleaner and more efficient. I know ripping a seam only to sew it again is not efficient, but this was also exercise in following instructions.
Trace your pattern. It seems like a lot of work but to preserve the original pattern and incorporate alterations, tracing the original pattern onto new paper is a good idea. I went back and forth on this one. The garment I made was the largest size, so I planned to work directly off the pattern but ultimately decided to practice tracing and transferring pattern markings.
Reinforce the shoulder seams. A knit specific pointer. Using either clear elastic, fusible tape (stretch or not), or even a selvedge edge will prevent gradual stretching and distortion. My pattern didn’t tell me to do this, but I have heard this recommendation in other places, most recently on The Love to Sew podcast.
Familiarize yourself with the techniques you’ll need. A simple pattern won’t require challenging techniques, but even a simple technique like basting the neckline or transferring pattern markings, required a bit of visual research in order for me to understand how to actually do it.
Throughout the entire process, you’ll want to have a clear space in which to work. The stretchy nature of knit fabric means that it should lay completely flat when being cut or sewn, otherwise it’s own weight can distort it.
Checking fit with a mock-up. Because I was working on a really simple pattern from a reputable designer, I trusted the sizing and the fit. I opted not to make a mock-up but definitely will do so for more complicated garments or when working with more expensive fabrics.
I experienced most of my challenges during the preparation and pre-sewing phase, but overall, I I felt that the process was relatively smooth and quick. In hindsight, the biggest challenge I experienced was finding the confidence to start.
References
Love to Sew Podcast. Episode 62: Sewing with Knits. Originally aired 2018 Oct 8. Hosted by Helen Wilkinson and Caroline Somos. Link.
“Difference between a Knit and Purl Stitch – Learn to Knit for Beginners – Lesson 2”. Jo Creates. 2017 August 29. Link. Last accessed March 2 2021.
makaalohilohi. “How to Knit and Purl”. Instructables.com. Link. Last accessed March 2 2021.